Looking Back

“Looking Back: Improve upon (or try an alternate version of) a previous challenge, or a recipe you are already comfortable with.”

I. Love. Chocolate.

Like seriously, I think chocolate is the Food of the Gods. Imagine my dismay when a historical recipe I was making for one of the last round’s challenges went horribly wrong. So horribly wrong that I didn’t take more than one bite and threw the entire batch away. The challenge was Sweets for the Sweet and I decided to make a chocolate caramel candy recipe. I took the time to do it just as written. The ingredients included Baker’s chocolate, brown sugar, butter, and milk. The resulting candy tasted like bitter molasses. It was awful.

Creole cover

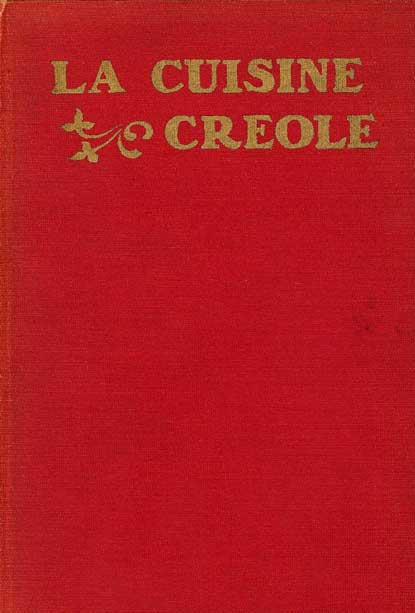
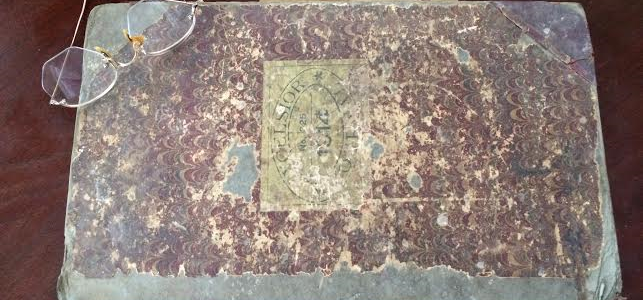
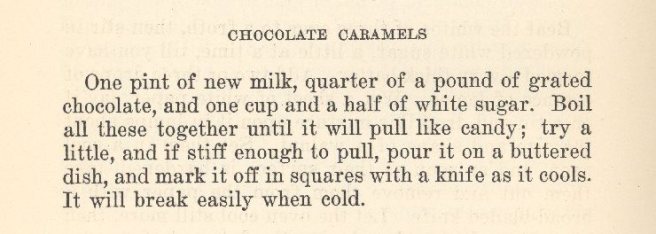
When I saw this challenge, I decided I would try to make historical candy again, but with a different recipe. I chose my recipe from La Cuisine Creole: A Collection of Culinary Recipes, From Leading Chefs and Noted Creole Housewives, Who Have Made New Orleans Famous for its Cuisine, a cookbook I found on online at Michigan State University’s Feeding America website. This website is an invaluable source for historical cookbooks that have been scanned in and are available free of charge. You can find the digital copy here: Feeding America  La Cuisine Creole was anonymously printed in 1885, but its authorship is generally accepted to be attributed to Lafcadio Hearn. While the majority of the receipts are for Creole cookery, I did find a recipe for chocolate caramels that sounded similar to the recipe I had used with just a little difference in sugar.

Along with chocolate, I can use this entry to extol the virtues of something else I love – Colonial Williamsburg in Virginia. My mom and dad brought my brother and I to Williamsburg when I was a child, then again in my early teens. As an adult, I have been there with my own family another six times. One of my favorite activities there is to sit in the middle of the Governor’s Palace Green and soak in the atmosphere. The colonial area is closed to motor traffic during the day, so all that can be heard is the slow clopping of horses’ hooves as they pull various types of carriages and wagons full of tourists from stop to stop. The smell in the air is that of boxwood in the spring and summer, a pungent spicy greenery that forms many of the garden hedges. My dream job is to be a historical cooking interpreter at the Governor’s Palace kitchen. It is located in a separate building on the edge of the courtyard and contains two rooms. One is a still room where all manners of confections and culinary delights can be found as well as various copper kettles, forms and implements for cooking. The other room is the kitchen proper with a large colonial style fireplace and adjacent oven. Foods are prepared using vegetables from the garden behind the building as well as fruit, milk, and other ingredients produced right there in the colonial area with historically accurate recipes and skills. The food is not available for tourists to eat, as it would not be able to pass quality tests, but for them to see the types of meals that were made for the British governor and his family to eat.

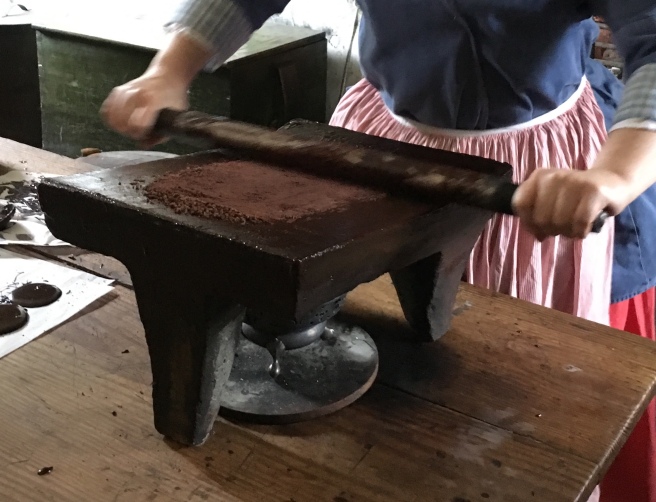
The last time we went to Colonial Williamsburg, the kitchen staff were making chocolate. They started with roasting the nut to rolling the chopped nuts, allowing the emollients within the nut to bring it to a semi-liquid form. The chocolate was then scraped off the chocolate stone, a special rolling stone that was heated to also help with the liquefying of the chocolate, and dropped into discs on parchment paper.  After they hardened, the discs would be stored for use as flavoring in hot water, as drinking chocolate was the only way it was consumed. The smell of chocolate in the kitchen that day was almost overwhelming. I spent a couple of hours there observing how the chocolate was made and trying to soak in as much information as possible.

IMG_1430

While I do not have a chocolate stone, I was able to purchase American Heritage Chocolate. If you have not heard about this chocolate, you can learn more here: American Heritage Chocolate  Basically, it was developed by Mars Wrigley, the company that brought us M&Ms.  Forrest E. Mars, Jr. worked with a team of historians with research by more than 115 global experts to create American Heritage Chocolate.

The Recipe:

Chocolate Caramels

Since my last try with chocolate caramels went so horribly wrong, I approached this time with extreme trepidation.  The recipe looked easy enough, but it did last time too!
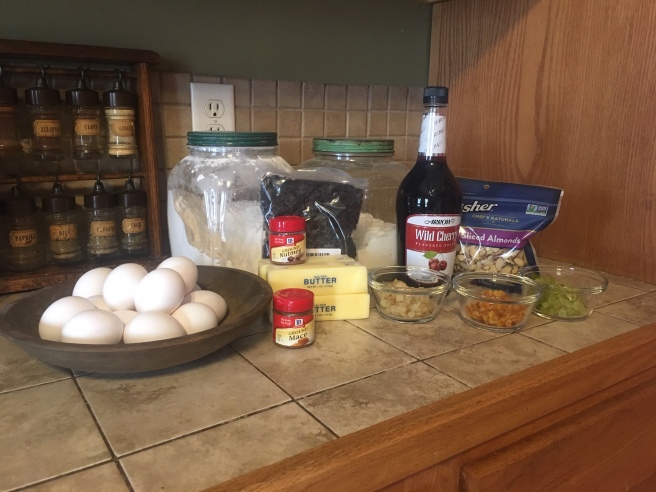
2 C milk

4 oz grated chocolate

1 ½ C white sugar

Butter

IMG_2401

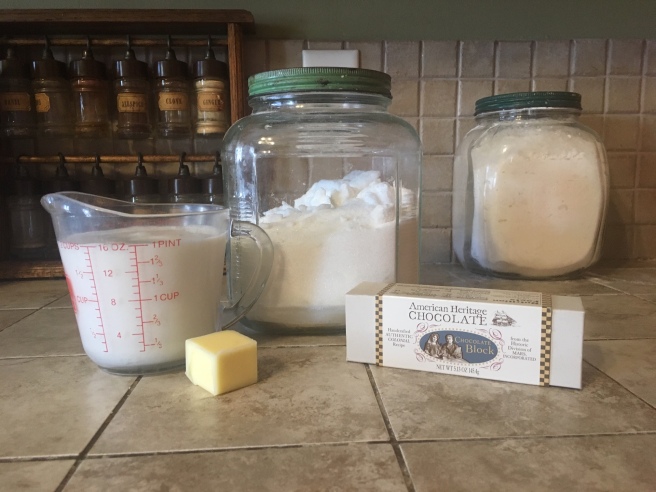
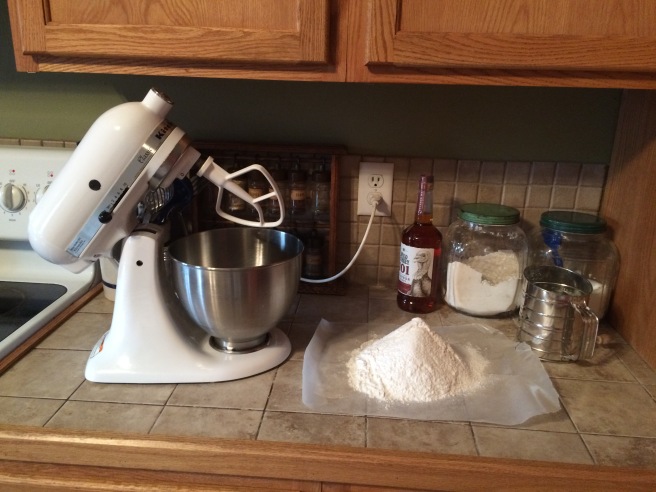
I prepared my block of chocolate by hand grating it. Once it was grated, I coated my cooking pan with butter, based from a different recipe I had read as well as preparing the dish I would pour it in when it was time.

I mixed my ingredients together and placed the mixture on a medium heat. I brought it to a rolling boil, all the while watching it carefully that it did not burn. I’m not a candy expert, so I decided to use my thermometer in order to be accurate with the temperature. “Stiff enough to pull” appeared to be soft ball stage via my research, which was 235 degrees Fahrenheit. As the mixture boiled and began to reduce, it became a rich, dark brown. The steam smelled amazing. As I watched my thermometer, I could only get it to 230 degrees, where it stayed for 10 minutes. It just would not go higher. I inched the stove knob slightly higher and immediately smelled it starting to burn. I decided to remove it from the heat, hot enough or not.

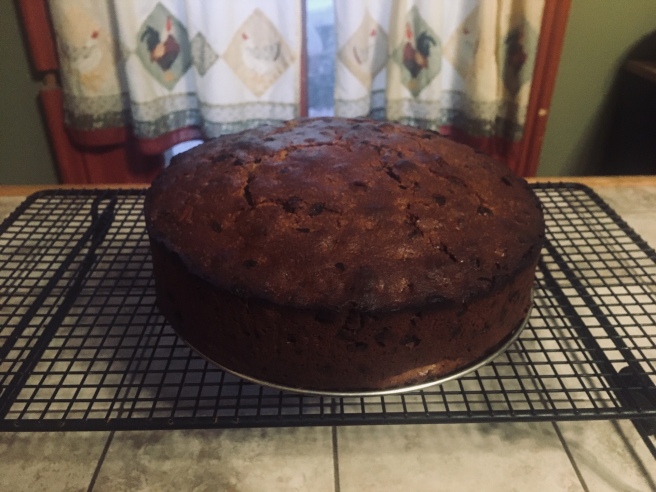
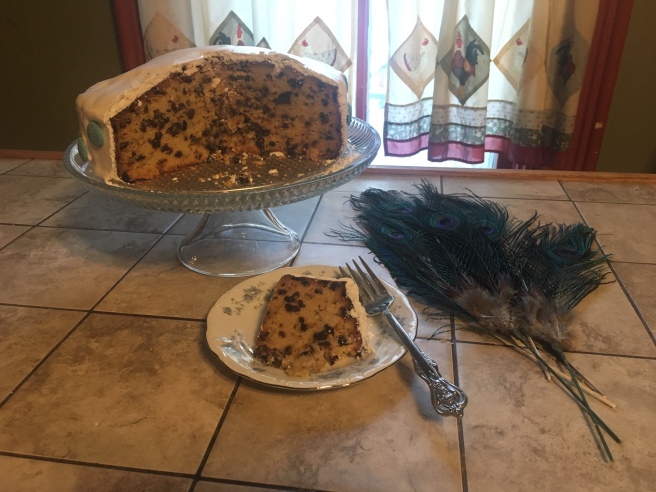
I poured it into my pan and waited patiently for it to cool.

IMG_2406

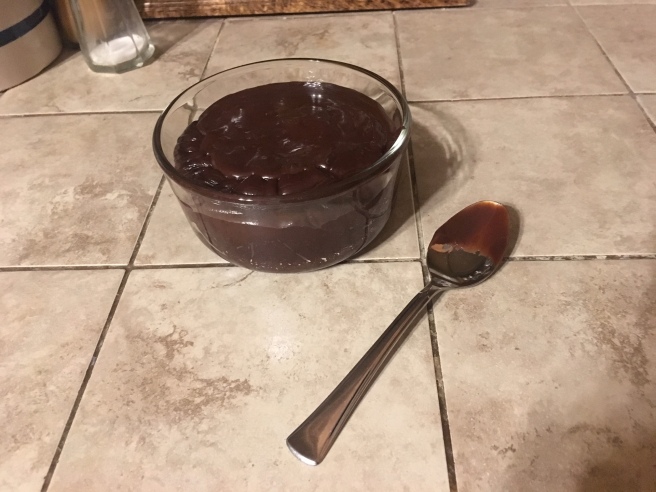
Since it did not get hard enough to cut or pull into pieces, I poured the thick, heavy sauce into a container. It tasted just as amazing as it smelled. There was no way I’m letting this go to waste! Now I just slip into the refrigerator and sneak a spoonful of it!

IMG_2409

The Date/Year and Region: 1885, New Orleans, Louisiana

Time to Complete: The whole process was 45 minutes, including the grating of the chocolate block.

Total Cost: I had all the ingredients, so $0 for me.

How Successful Was It?: While I couldn’t get the firmness needed, the resulting sauce is amazing.

How Accurate Is It?: I used an electric oven and candy thermometer.

Next up – Soup!

I’ll be cooking for you soon!

Amber

New Year’s!

“New Year’s! – A new year, a new era, a new receipt, or a food intended for New Year’s.”

Trying to Find Inspiration

My family does not any New Year’s Eve or New Year’s Day traditional foods. Typically, it was a day to hang out with family and friends, watch some football, eat some snacks. As a result, I needed to do a little wandering on the internet. My journey brought me to the website for Townsend’s. I love to watch their cooking videos and dream about working in their 1700s kitchen set. One of the videos I watched was for a Twelfth Night Cake. You can watch it here: https://youtu.be/B5FzKB5TW0Y

Twelfth Night Cake

Twelfth Night is the celebration of the Epiphany, the day the wise men were to have arrived after the birth of Jesus. The Smithsonian Institute describes a Twelfth Night party as this:  “According to the 1923 Dennison’s Christmas Book, “there should be a King and a Queen, chosen by cutting a cake…”  The Twelfth Night Cake has a bean and a pea baked into it.  The man who finds the bean in his slice of cake becomes King for the night while the lady who finds a pea in her slice of cake becomes Queen for the night.  The new King and Queen sit on a throne and “paper crowns, a scepter and, if possible, full regalia are given them.”  The party continues with games such as charades as well as eating, dancing, and singing carols.” Other sources suggest decorating the cake with either a crown or feather plumes. I decided to use the recipe suggested in the Townsend’s video, taken from The English Art of Cookery, According to the Present Practice (1788) by Richard Briggs, however I was going to use 1/3 recipe.

IMG_2221

I assembled all my ingredients together and dove into the baking.

IMG_2273

I needed to use multiple bowls and multiple mixers. Luckily, I have plenty of both! I set the KitchenAid to whisking the egg whites while I beat the butter and sugar after mixing the dry ingredients together and the fruit and almonds soaked in the brandy. As I began adding the contents of the various bowls together, I really started to wonder if it would all fit in the bowl of the KitchenAid! With the last bowl of ingredients added, I carefully turned on the mixer. A few ingredients fell out, but the majority remained in the bowl! Great Success! I spooned the mixture into my prepared springform pan that was lined with parchment paper and buttered.

Next, it went into the oven for two hours! It actually took that long to bake and be done when I tested it.

IMG_2278

After it cooled, I began mixing the icing together. The icing recipe also came from Briggs’ The English Art of Cookery. I used the written recipe cut in half. I also did NOT beat the icing for three hours (!) as was written in the original recipe.

IMG_2225

Once the icing was at the thick, creamy consistency I needed, I covered the top and sides of the cake and set it in the oven at 200 degrees Fahrenheit for an hour. The icing became a hard crusted glaze as it dried.


Sources had mentioned using fondant to fashion a crown to place on the top or to insert a plume of feathers. I decided to go with the feathers, as well as additional decoration in the form of blue tinted chocolate discs in the place of non-pareils.

IMG_2282


I thought it turned out beautifully! It was definitely a very impressive cake, and I hadn’t even used a full recipe! The texture was dense and the flavor was very much like fruitcake. The icing was very fragile, cracking easily, making it a little difficult to eat. My husband and I can’t eat an entire cake, so I gave it to anyone who was willing to try it. Some people loved it, some people did not. My daughter told me that she and her boyfriend “wouldn’t look forward to eating it, but if we were hungry we would.”

IMG_2287


The Recipe:  This is the modified recipe I used.

Ingredients:

1 Lb. Butter

1/2 Lb. Sugar

8 Eggs (yolks & whites separated)

3 C. Flour

1 t Ground Mace

1 t Ground Nutmeg

1/2 c. Brandy

1/4 c. Candied Citron Rind

1/4 c. Candied Orange Rind

1/4 c. Candied Lemon Rind

1 C. Slivered Almonds

1 Lb. Zante Currants

Directions: Mix currants, citron rind, orange rind, lemon rind and slivered almonds, soaking them with the brandy once mixed. In a separate bowl, mix flour, mace and nutmeg. In another bowl, whip egg whites until stiff peaks form; whip egg yolks in a separate bowl. In a separate mixing bowl, cream the butter until it looks like whipped cream; then add the sugar until smooth and fluffy. Gently fold whipped egg whites and eggs yolks together; quickly and gently fold flour mixture into the egg mixture. Finally, gently fold the flour and egg mixture into the dried fruit mixture, being sure to not over stir. Bake at 350 degrees Fahrenheit for 2 approximately hours.

This is the modified icing recipe:

6 egg whites

2 C. sugar

Take the egg whites and sugar, mix together and beat it well for 10 minutes until it looks white and thick. Then with a thin paste knife spread it all over the top and sides of your cake, and ornament it with sweet non-pareils, or fruit paste, or sugar images, and put it in a cool oven to harden for one hour, or set it at a distance from the fire and keep turning till it is hard.

The Date/Year and Region:  1788, England.

How I Made It: See above.

Time to Complete: Approximately five hours. This included three hours of baking time alone.

Total cost: I had to order the candied rind, the currents and I didn’t have brandy. Those ingredients alone cost $30. With the other ingredients that I did have, I would estimate the total cost to be approximately $38 – $40, plus the cost of feathers, which were another $10. That is the monetary cost and doesn’t include the time it took to make the cake. I feel this must have been for the rich to splurge with due to the amount of time it took and the amount of very rich ingredients. The average shopkeeper’s wife, farmer’s wife or dressmaker did not have the 7-8 hours it would have taken to bake and decorate this cake as written.

How Successful Was It? I would say moderate success. I feel the cake was sort of like fruit cake: you either like it or you don’t.

How Accurate Is It? I used two mixers and it was baked in an electric oven. For what it’s worth, I also used eight bowls while making this cake. I also did not put a coin or a bean in the cake. I was concerned about putting a modern coin in the mixture and while I have a reproduction silver pudding charm set, I’m pretty sure the last time I used it my grandpa ate the button without knowing it…

Next up – Looking Back

I’ll be cooking for you soon!

Amber

What Happened?

Well, life. Life happened. New demanding job, wedding of my son, beginning of the long goodbye with my father, another new job….

IMG_4176
My son and his beautiful bride
IMG_4156
Simply beautiful…
IMG_1462
My parents on their 50th wedding anniversary. My father had Parkinson’s Disease and dementia. He was an amazing man.

Just as I was beginning to restart my cooking challenges, they were updated with new challenges for this year. I will return to the previous Round 2 challenges eventually, mostly because I have all the recipes planned out! For now, however, I will be cooking the challenges for Round 3, 2019.

Next up – New Years! (And yes, I did my cooking within the fortnight, just need to find time to get them posted!)

I’ll be cooking for you soon!

History Detective

“History Detective – For this challenge, you get to be the detective! Either use clues from multiple recipes to make a composite recipe, or choose a very vague recipe and investigate how it was made.”

Using a Family Treasure

For this challenge, I turned to my personal hoard collection of cookbooks. I chose the one that is the nearest and dearest to my heart – the handwritten cookbook of my Great-Grandma Olive. It is written in a journal dated 1914 on the cover.

greatgrandma olive

My Great-Grandma Olive was born in Albion, Michigan in 1880. In 1898, at the age of 18, she married my Great-Grandpa Jud Hoyt, and they were the parents of my maternal grandfather Daryl, the youngest of five children. Olive and Jud were farmers in rural Michigan where they had a self-sustaining farm on land that was homesteaded by Jud’s father, Lewis Hoyt. Their home received electricity in 1944, they did not have running water, and the outhouse was in use as the only means of relief until the mid 1970s. My Great-Grandpa Jud raised draft horses with which they did the majority of their farming. The picture above was taken in the late to mid 1930s.

Within the pages of Great-Grandma Olive’s collection of recipes I discovered a recipe that was very vague – a perfect recipe to use in this Historical Food Fortnightly challenge.

Soldier Cake

The recipe was for Soldier Cake, and it was simply a list of ingredients along with the dates 1917-1919 written next to the title. This meant it was directly from the time of the United States’ involvement in World War 1.

The United States officially declared war upon the German Empire on April 6, 1917. On August 10, 1917, the U.S. Food Administration was established under the direction of Herbert Hoover to manage wartime supply, conservation, distribution and transportation of food. This was largely a voluntary program that relied on Americans’ compassion and sense of patriotism to support the larger war effort.

This included voluntary restriction on meat, wheat and sugar. Individuals were encouraged to participate by modifying eating habits to increase the amount of food that could be shipped to US troops stationed in Europe as well as the people from the Allies who had already been at war for three years. The promotion encouraged eating fresh fruits and vegetables, which would be harder to ship overseas, as well as limiting wheat, another fairly easy commodity to send overseas. As a result of these conservation efforts, food shipments to Europe doubled within a year and consumption in the United States dropped by 15 percent.

Part of the war propaganda included demonization of the German population. I found evidence of a statement or oath that my great-grandmother had included within the pages of her recipes:

the oath

the oath 2

It appears that my great-grandmother did her part with the use of Soldier Cake.

soldier cake

She appears to have written it only to remind herself of some of the key ingredients. There is no time or temperature for baking, there is no mention of flour and there is only the word “Spices”. Another notation that is under each of her recipes it that of “All” underlined and circled. I asked my mom if she knew what that stood for, and she had no idea. So if any of you dear readers have a theory, I would love to hear it!

I began my investigation of Soldier Cake by looking for other recipes called that. I found references online to cakes that were sort of similar, but nothing with the same ingredients. So, then I made an online search with the words “cake, molasses, sour cream, egg” in the search field. That took me to a site that had a recipe for “President Harrison Spiced Molasses Cake” edited by Peggy Trowbridge Fillippone (homecooking.about.com) She states that molasses cake was a particular favorite of President William Henry Harrison, who was the foodie of his day. The recipe source was from The Spice Cookbook by Lillie Stuckey and Avanelle Day, published in 1964.

In the end, I called upon my personal experience and spice imagination to determine what needed to be done with this recipe. I assembled the known ingredients, then raided my spice rack for the rest.

I knew I needed some salt, which was not in the original and I knew I needed flour to get the batter to a cake consistency.

I mixed the known ingredients together, which was a very thin tasteless consistency. From there, I added a little of this spice and that spice. I continued tasting until I had a combination that really hit. At that point I added 1 cup of flour, which was just perfect in turning the thin liquid into a cake batter consistency. The batter filled one 9″ baking pan and I decided to bake it at 350F for 25 minutes. My toothpick came out clean and after some cooling, I turned the cake out into a glass pan.

This was amazing! It was very moist, dense and rich with flavor. In fact as a couple of days passed, it only became more flavorful as it mellowed. I could totally envision my Great-grandma Olive baking this cake as a midday treat, and as firm as it was, it would be a perfect accompaniment to a lunch taken to the field.

The Recipe: My Great-Grandma Olive’s personal recipe collection written in her hand in a 1914 journal, from my personal hoard collection.

The Date/Year and Region: 1917-1919 World War 1 era, made in Michigan (Midwest), however I am not sure the origin of this recipe. I’m guessing Great-Grandma Olive may have heard it from a neighbor or friend.

How I Made It: See above.

Time to Complete: 40 minutes, including spice tasting and baking time.

Total Cost: For me, nothing. I had all ingredients at hand. I would estimate a minimal cost of $5.00-$7.00.

How Successful Was It? Total success! I will definitely make this recipe again. The only thing I would add would be whipped cream, or possibly ice cream.

How Accurate Is it? I used a hand mixer and it was baked in an electric oven. I will say that this just goes to show that molasses was a very good substitute for sugar. I would like to hope that Great-Grandma Olive would approve!

prop6

Next up – Sweets for the Sweet!

I’ll be cooking for you soon!

Amber

Culinary Vices

“Culinary Vices – Some foods are really, really naughty. Globs of butter, lashings of sugar and syrup, decadent chocolate and wine. Bring out your naughty indecorous side with foods associated with all the bad things, in the best ways.”

Butter. Sugar. Eggs. Kentucky Bourbon. Just those ingredients alone sound decadent, naughty and bad. I played with all these ingredients for Historical Food Fortnightly Challenge #2 by baking a Lane Cake.

The Recipe, Date/Year and Region:

The Lane Cake started out as a regional dessert in the Georgia/Alabama/Mississippi area introduced by the cake’s developer, Emma Rylander Lane. Ms. Lane wrote a self-published cookbook called A Few Good Things to Eat in 1898. As time went on, the Lane Cake was included in Atlanta Woman’s Club Cook Book (1921), in Southern Cooking (1941) and then in the now-classic To Kill a Mockingbird (1960). With each publication and each new version, different ingredients were added, including nuts, coconut and dried fruits. I wanted to make the original “Prize-Winning Cake” developed by Ms. Lane.

I searched high and low, scouring the internet until my eyes were crossed, trying to find my primary source for this challenge. Ms. Lane’s cookbook is not in the digitized world and is very scarce in the printed world. The best I could do was an article from the Spokane Daily Chronicle printed December 20, 1967 (news.google.com) with both the recipe and an interview with Ms. Lane’s granddaughter, Emma Rylander Law. In the article, Ms. Law states that she had made her grandmother’s prize winning cake exactly as her grandmother did, although modernizing the method of making. She recounted how the Lane Cake was served at holidays and tea-time with guests.

Lane cake recipe

How Did I Make It?

I started by sifting my dry ingredients together, just as the recipe called for, onto wax paper. Luckily, I have a sifter! (Note Wild Turkey bottle in the background – more on that later!)

sifting

I made my batter, using the 1 cup of butter, 2 cups of sugar, and 8 egg whites the recipe called for. Alternating the dry ingredients with the milk called for, the batter became a rich thick mixture, which I poured into 4 9″ cake pans, and baked for 20 minutes.

While my cake layers were baking, I made the custard filling with the 8 egg yolks, 1 cup sugar, 1/2 cup butter, 1/3 cup bourbon, 1 teaspoon vanilla and the seedless raisins. The bourbon and vanilla weren’t added until the custard was made, retaining the alcohol provided by the bourbon. I chose Wild Turkey bourbon for three reasons: It was from Kentucky, my Grandma Myrtle’s childhood state, the company was crafted in 1855 and my husband and I had toured the distillery, exploring the rickhouses where the barrels are stacked to age just right. Mmmm…. I still remember that wonderful bourbon aroma!

THE CUSTARD WAS TO DIE FOR!!!

Seriously. Rich creamy custard with the warm heat of bourbon and just the right amount of flavor from the vanilla and raisins. For Real.

assembly

I assembled my layers with the filling between each layer. It looked really yummy at this point! And I know that the filling was yummy – I couldn’t let the little bit on the spoon go to waste!

After the layering, I needed to make “Boiled White Frosting (from a standard recipe)”. For that recipe, I turned to the White House Cookbook’s version of Boiled Frosting from the 1887 Edition. (digital.lib.msu.eduFour more egg whites, a pound of confectioner’s sugar and some vanilla. I have never made boiled frosting before, and as a result, it took a lot longer than I thought it would. The recipe calls for boiling the sugar and three wine glassfuls of water until it is perfectly clear and threads from a spoon. After what felt like forever, I finally broke out the candy thermometer because I didn’t know when it had hit the threading temperature. After adding the syrup to the egg whites, the recipe said “beat all well together for one half hour.” This girl’s not about to beat that by hand for that long. My Kitchen Aid mixer to the rescue!

The frosting was ready and I frosted the cake, taking care to keep filling from getting out from under the layers.

completed

Time to Complete: About two hours – longer than it probably should have, but it was mostly due to that frosting. However, I did follow the directions and let the cake age for two days before eating it on the third day.

Total Cost: About $25.00. I needed to get a new bottle of bourbon and that was the most expensive ingredient.

How Successful Was It? It was good! The cake was dense, but not hard. As I said before, the filling was fabulous. I could eat the filling all by itself and be happy with that! And the frosting was ok, but it tasted like marshmallow fluff, which I am not a huge fan of. It was super rich. A very fine sliver is really all that was needed.

cake slice

How Accurate Is It? I used an electric stovetop and oven for both the filling and the cake, as well as my Kitchen Aid mixer for that frosting.

Did you total all the decadent ingredients? 3 cups of sugar, a pound of confectioner’s sugar, 1 1/2 cups of butter, 12 eggs and 1/3 cup of bourbon.

Next up – History Detective! I’ll be cooking for you soon!

Amber


Meat and Potatoes

“Meat and Potatoes – They’re a staple for the tables in the most rustic cottages as well as the fanciest banquet tables – and it’s also an idiom meaning a staple or the most basic parts of something. Make a historic “meat-and-potatoes” recipe – however you interpret it.”

Discovering the challenge Historical Food Fortnightly was an exciting moment for me. It allowed me to do three of my favorite things – read history, research and cook! I excitedly looked at all the challenges and pored through my hoard collection of vintage cookbooks. I have been blessed, just like my Grandma Myrtle, in that I can read a cookbook like a novel – reading the ingredients and how to put the dish together, imagining the combination of flavors and textures, smelling the outcome with the olfactory portion of my memory. As I looked, and read, and imagined the recipes I could use for each of the challenges, I decided I would use the cookbooks I personally own for as many of the challenges as possible.

FullSizeRender

The first cookbook I decided to use was “The Every-Day Cook-book and Encyclopedia of Practical Recipes” by Miss E. Neil, published in 1892. I purchased this gem at an auction that was JUST COOKBOOKS!!!! I thought I was in heaven that day. I was competing against ladies that looked like my grandma for all these different cookbooks and they were cut-throat! Don’t let that white hair fool you. Those ladies were just as serious about their purchase of cookbooks as a heart attack. And I know the auctioneers were surprised at the intensity of the bidding. At the end of the day, I was able to come away with Miss Neil’s guide. As I looked over my collection, I came to the conclusion that a basic cookbook would be the perfect choice for a basic meat and potatoes dish.

FullSizeRender_1

A GOOD DISH.

I decided after reading through the directions that I would need to precook my meat, which I chose as a three pound chuck roast, due to the fact the baking would need to be short, just long enough to warm the dish. Because I was making this for Sunday dinner, I decided to use my crock pot for the cooking of the meat. I only added a little salt, pepper and water with the roast in the crock.

While my potatoes were boiling, I set in to mincing the meat. Basically, I just sliced it across the grain in half inch slices, and then separated the meat fibers so it was loose. I covered the bottom of the pan with the meat and added the pinches of seasonings according to the directions. My very sharp chef’s knife, which I refer to as Jason, made quick work of the task.

FullSizeRender_2

FullSizeRender_3

I used two and a half pounds of potatoes along with a half pint of cream and four tablespoons of butter and a couple shakes of my salt shaker. They mashed beautifully.

FullSizeRender_4

I covered the meat with the mash, and then whisked an egg and about a quarter of a cup of cream to pour over the top.

At this point, I covered it with foil and transported it to my parents’ house. They knew I was bringing Sunday dinner, and they knew I was using them as the guinea pigs to my first HFF challenge. I asked my mom to preheat the oven to 350 F, and put the pan in for about 15 minutes. After checking the top to see if it had browned yet, I decided that I needed a hotter oven so I upped the temperature to 425 F, resulting in a nice toasted top after 10 minutes.

IMG_3374

My family eagerly dug in for dinner. Everyone liked it. My mom said she would give it an A.

IMG_3375

What they liked – the enhancement the addition of cloves gave to the beef. I have never added cloves to meat. I have always seen it as a dessert-type of spice. However, after this dish, I think I will experiment a little more in using it for savory dishes.

What they didn’t like – it seemed kind of dry. My husband added extra butter to the top. I had planned on using my drippings for a gravy to accompany the dish, but had forgotten to make it during my preparation time. I definitely think it needed it, and it would be an easy addition to make.

So here it is…

The Challenge: A meat and potatoes dish.

The Recipe: Was found in The Every-Day Cook-book and Encyclopedia of Practical Recipes by Miss E. Neil.

The Date/Year and Region: The book was published in 1892 by Regan Printing House in Chicago, IL, so I believe this recipe would be considered Upper Midwest.

How Did I Make It: See above.

Time to Complete: It took approximately 90 minutes to make this dish. That includes my oven temperature adjustment and extra time, but does not take into account the overnight cooking of the roast in the crock pot.

Total Cost: $15.00  The roast was the most expensive ingredient at $13.00.

How Successful Was It? It tasted good, and looked great. If I were to make it again, I would increase the amount of cloves I used. I had followed the directions and used a pinch, but I would have liked it just a little more spicy. I also would have made gravy to serve with it.

How Accurate Is it: I used a crock pot for the roast, an electric stove for the potatoes and a gas stove for the completion. But those potatoes were mashed by hand – no mixer for this girl!

Next up – Culinary Vices! I’ll be cooking for you soon!

Amber